How to set up a WordPress multisite?

So, you’ve decided you’d like to set up a WordPress multisite, but how do you actually set one up?
What follows is a step-by-step guide on how to correctly install and configure a WordPress multisite, written for the tech-y marketer not afraid to get their hands into some WordPress back-end.
If you’re not sure whether a multisite is the right approach for you, follow this link to learn alternatives to a multisite that could also be a good fit.
Installation
The very first thing to do after WordPress has been installed is to open the the wp-config.php file with your preferred editor, and to add this line right before the /* That’s all, stop editing! Happy blogging. */ line:
/* Multisite */
define( ‘WP_ALLOW_MULTISITE’, true );
Once this code has been added, save the file and check that all the plugins are deactivated. If they’re not, proceed to deactivate all of them.
You can then go to: Tools > Network Setup, where you will find this screen:
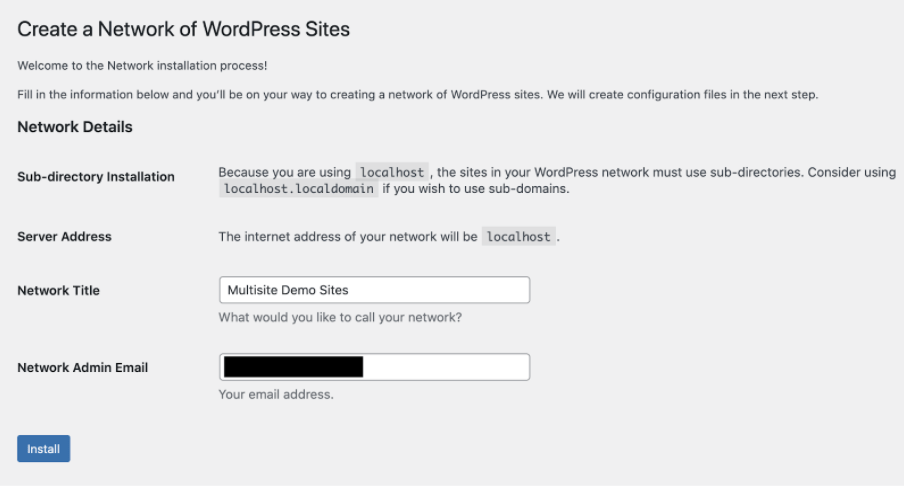
Once you’re here, click on ‘Install’ and as you can see in the image below, you will be provided with some lines that need to be added to your code (wp-config.php and .htaccess files) to enable the network. The route to these files will depend on where your environment is located.
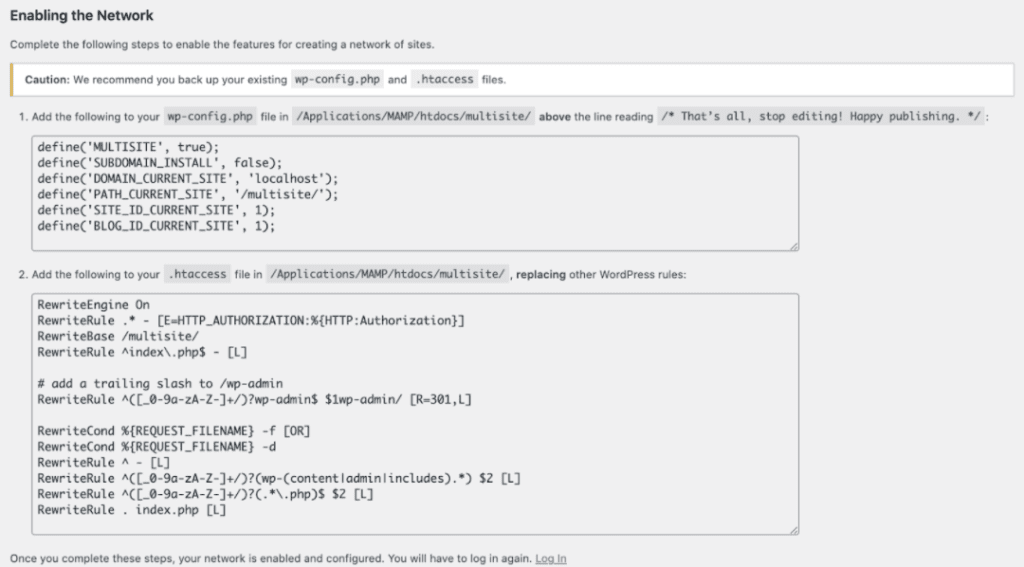
In our case I am using a local environment (localhost) and called it: “Multisite Demo”. So these will change depending on your configuration.
After updating the wp-config.php file you will need to log in again and at this point the network is.. ready! Ok not quiet, at the moments your WordPress multisite has just been enabled, and you are ready to start configuring the network settings and adding new sites.
Network Admin
You will notice that the admin menu is a little different now, with less items on the left admin menu and items like posts, pages, media… missing.
This is because you are now in the newly created Network Admin area. That is from where the network will be managed, and the changes made here will affect all the sites from the network.
There is now also a Super Admin role. It is the only role that will have access to this set-up. The Super Admin role is specific for multisite networks and is the only role that is able to add new themes and plugins to the network.
It is important to note that both themes and plugins are enabled from here, but they can be activated/deactivated at a site level depending on the site’s necessities.
Network settings
This can be found in: Settings > Network Settings. From here you will be able to configure some of the more important settings in the network.
You can set whether users can add new sites or accounts, or if the network admins should be notified when new users are added to the sites.
You can also give permission to site admins to add new users to their sites and control site registrations by limiting or banning certain domains.
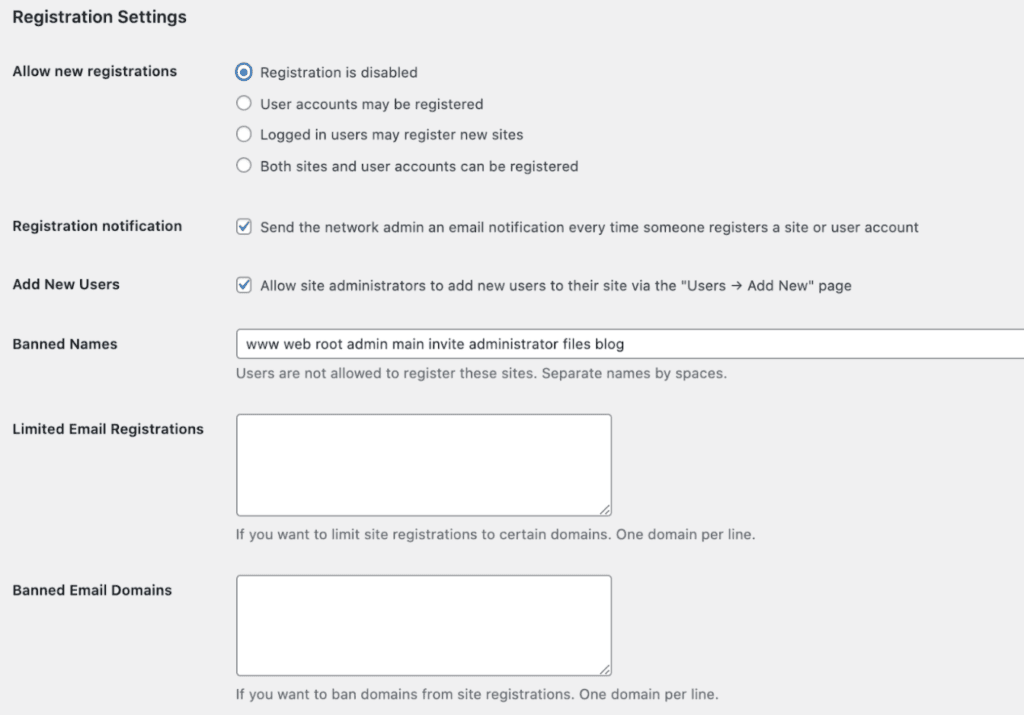
Another important option from the Network Settings is the Menu Settings. Enabling this will display the Plugins item for the admins of the sites on their corresponding site menu. This means that they will be able to activate and deactivate plugins but not to install or remove them.

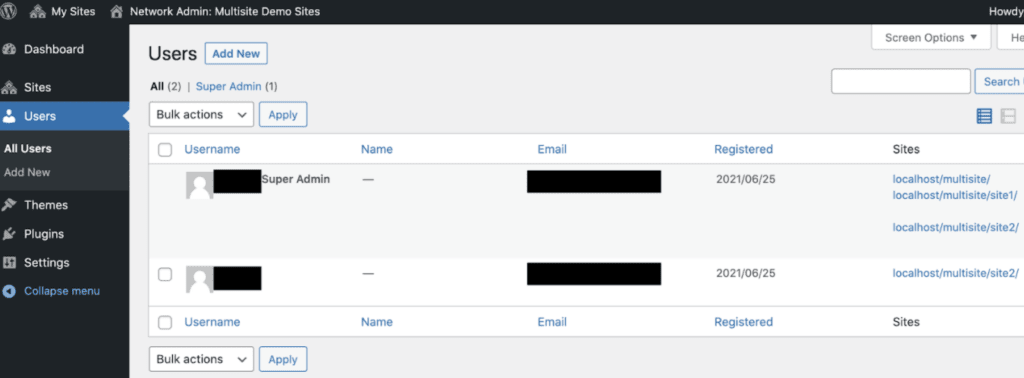
Users
By clicking on the “users” tab on the left, you can see all the users registered on the network and the sites each user has access to.
Manage sites
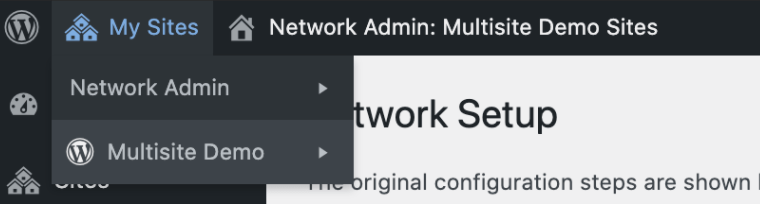
By now you probably will have noticed there is another new item on the top menu bar called “My Sites“, even though in some cases (like in this one) we still have only one site.
You’ve probably guessed what you’ll find here… Once more sites have been created, this is where all the sites belonging to the network will be found.
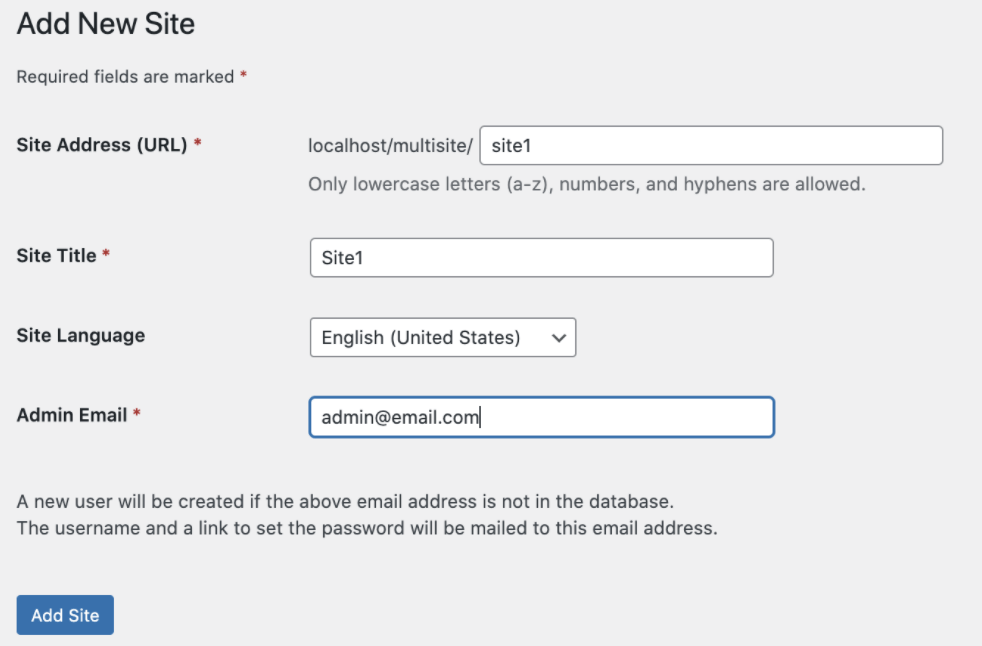
To start adding sites and configuring them go to My Sites > Add New
After more sites have been added, if you go to My Sites > Network Admin > Sites, you will see something like the image below. By selecting any of the sites, more details about their info, users, themes and settings will be presented.
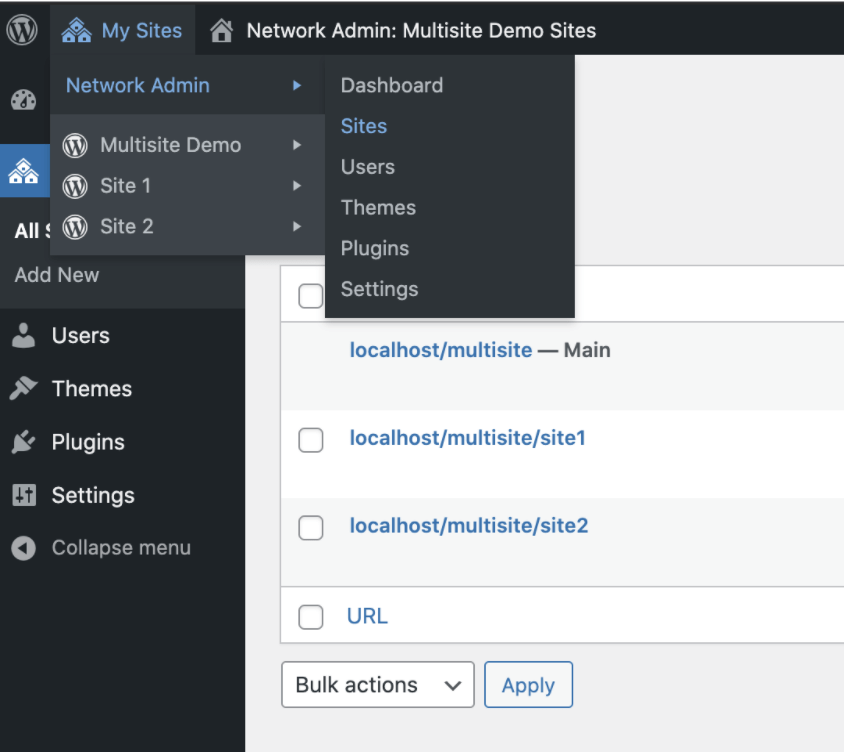
From here you can access to the dashboard of any of the sites (My Sites > Site 1 > Dashboard) where you can control the site specific settings as you would usually do for any site, but with restrictions explained earlier.
Other peculiarities
Generally, apart from a couple of differences we discussed earlier, a multisite network is very similar to the typical WordPress site.
The sites that belong to the network can be pretty much managed as they would usually be. But there are a few additional differences that are worth highlighting:
First, is that all the sites in the network will share the same database. However, in this case some tables are duplicated and independent for each site being identified by adding a number after the prefix and before the table name (i.e. wp_1_posts). Therefore, the more sites added to the network, the more tables will be also added to the database.
The second difference is related to the uploads folder. Each WordPress multisite will contain a folder for each one of the sites belonging to the network. They are likely to have the same structure, and can be usually found in a standard WordPress site.
If you’re still unsure as to which option to go for, or would like to discuss a multisite for your company, we’d be happy to chat. Get in touch with us here.

Establishing your B2B content marketing goals

Meet the team: Joss
Let's Talk
Do you have a web design and build project coming up that you would like to talk about?